
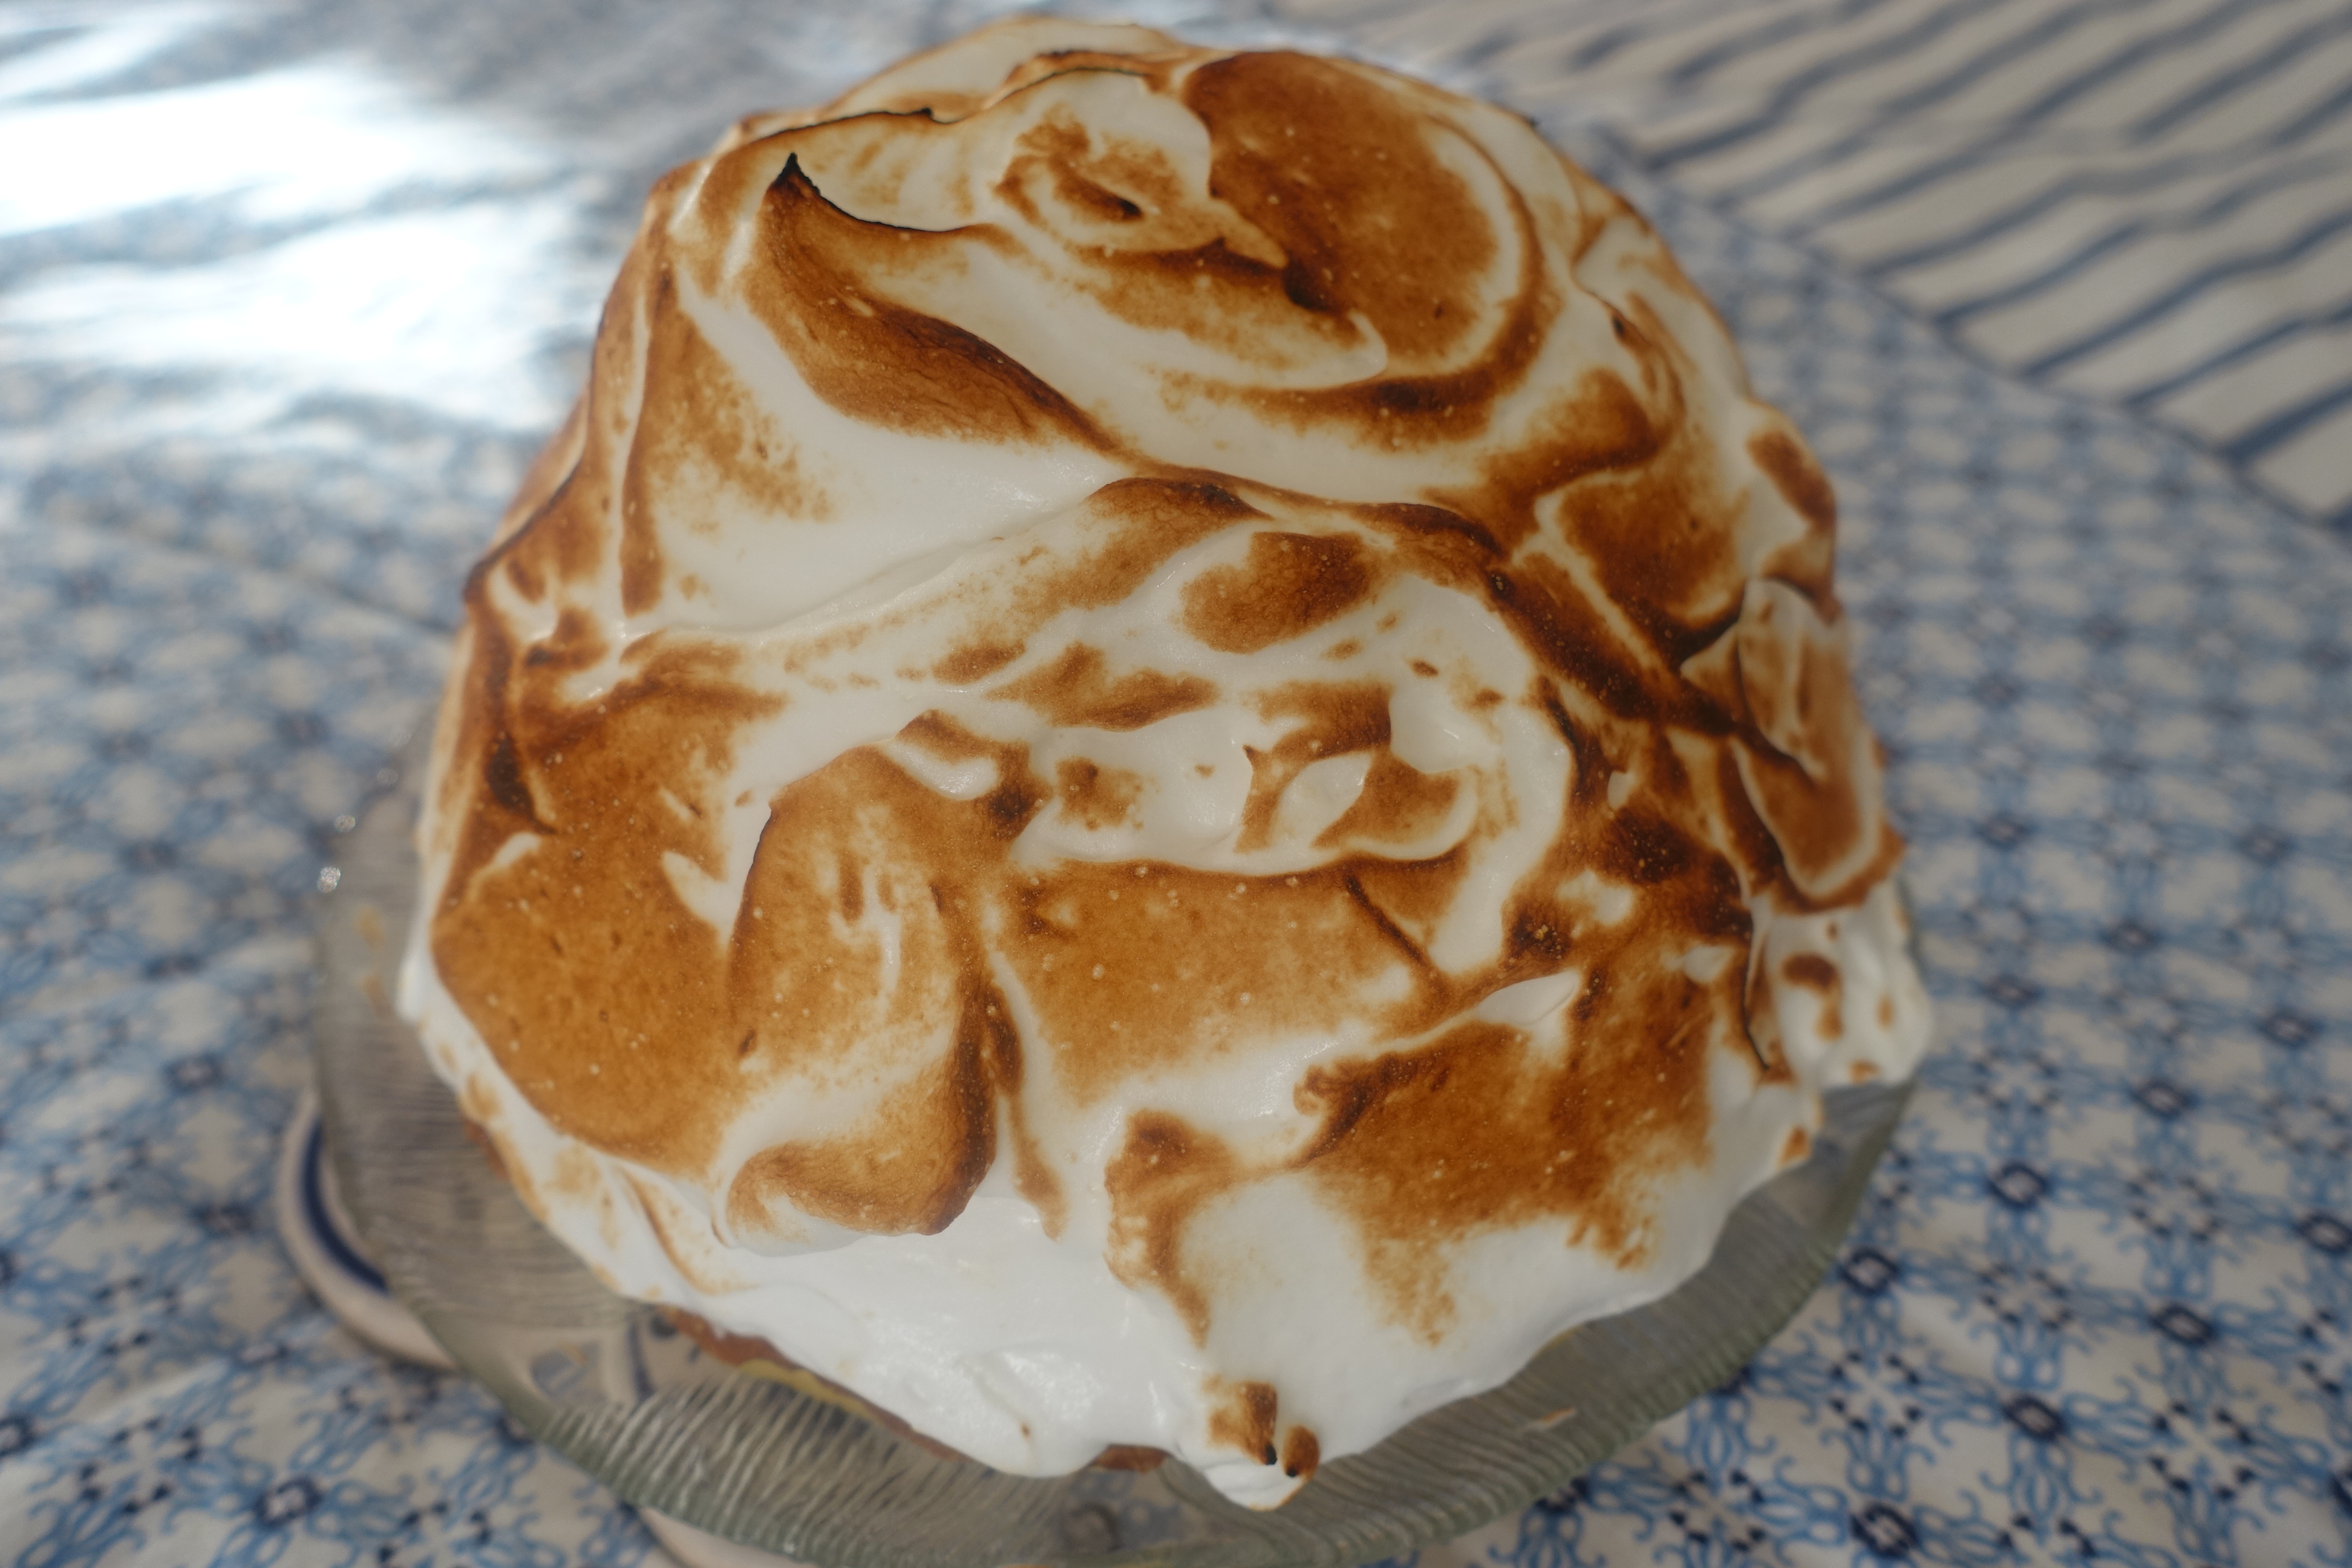
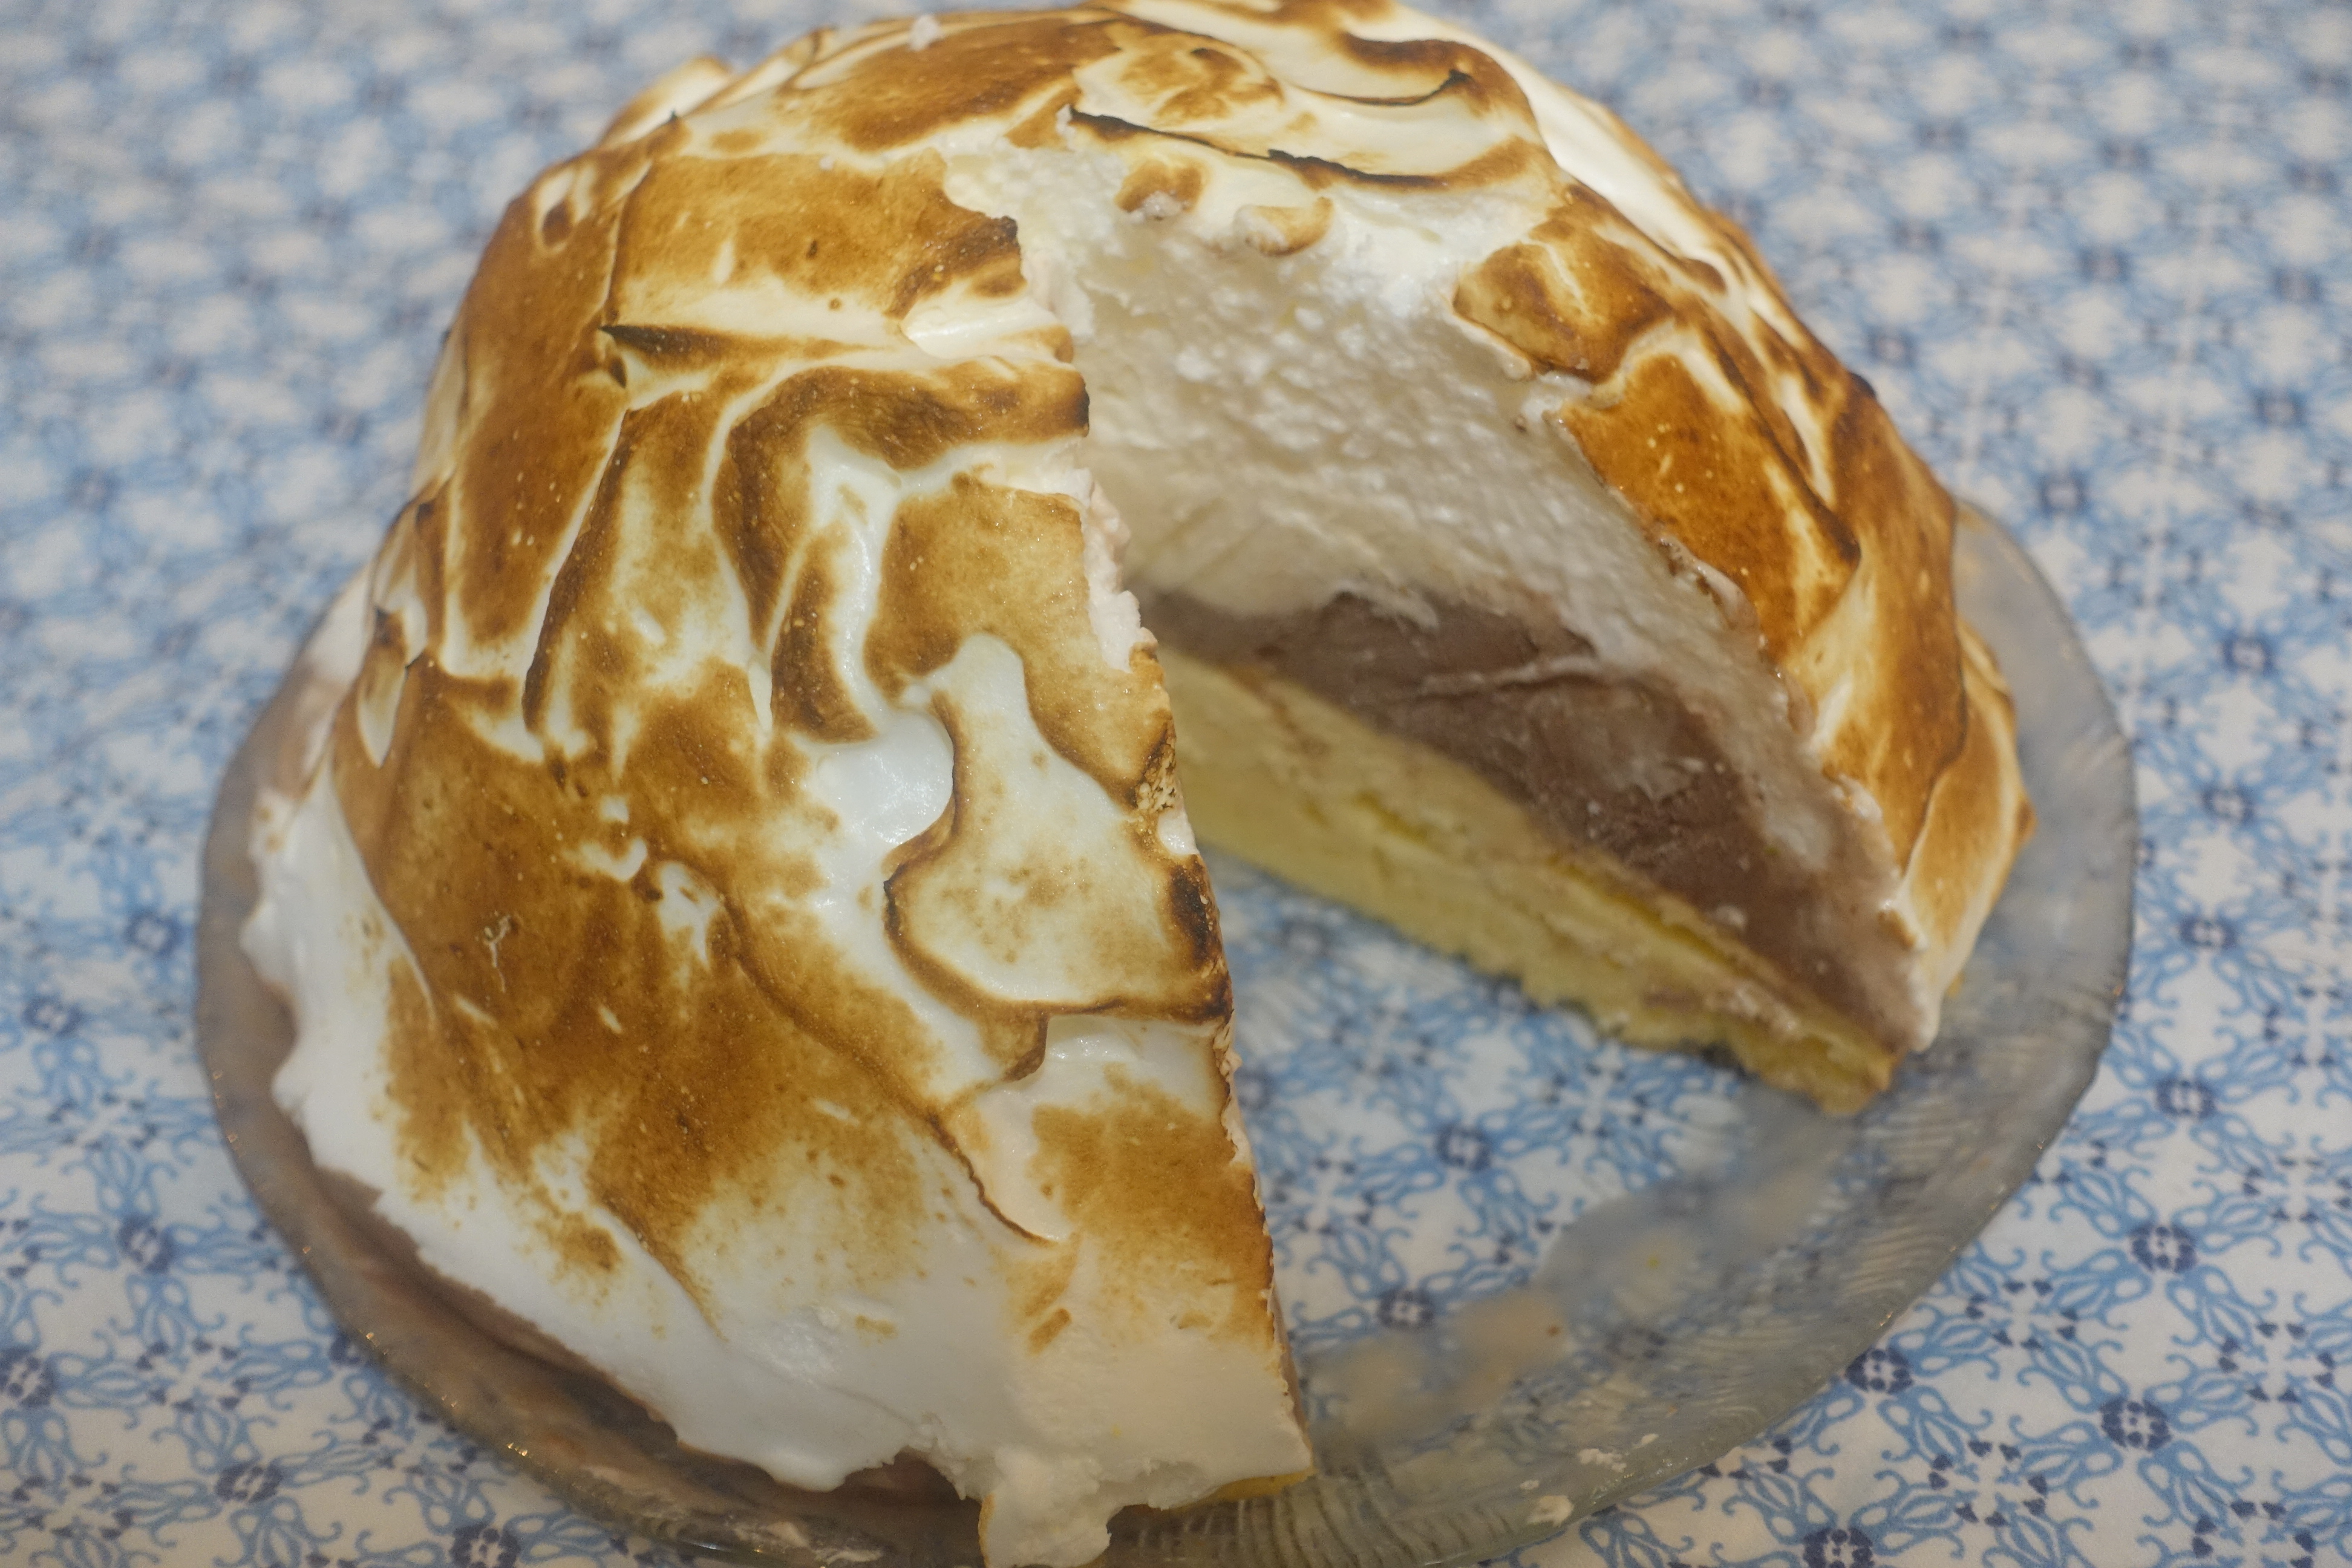
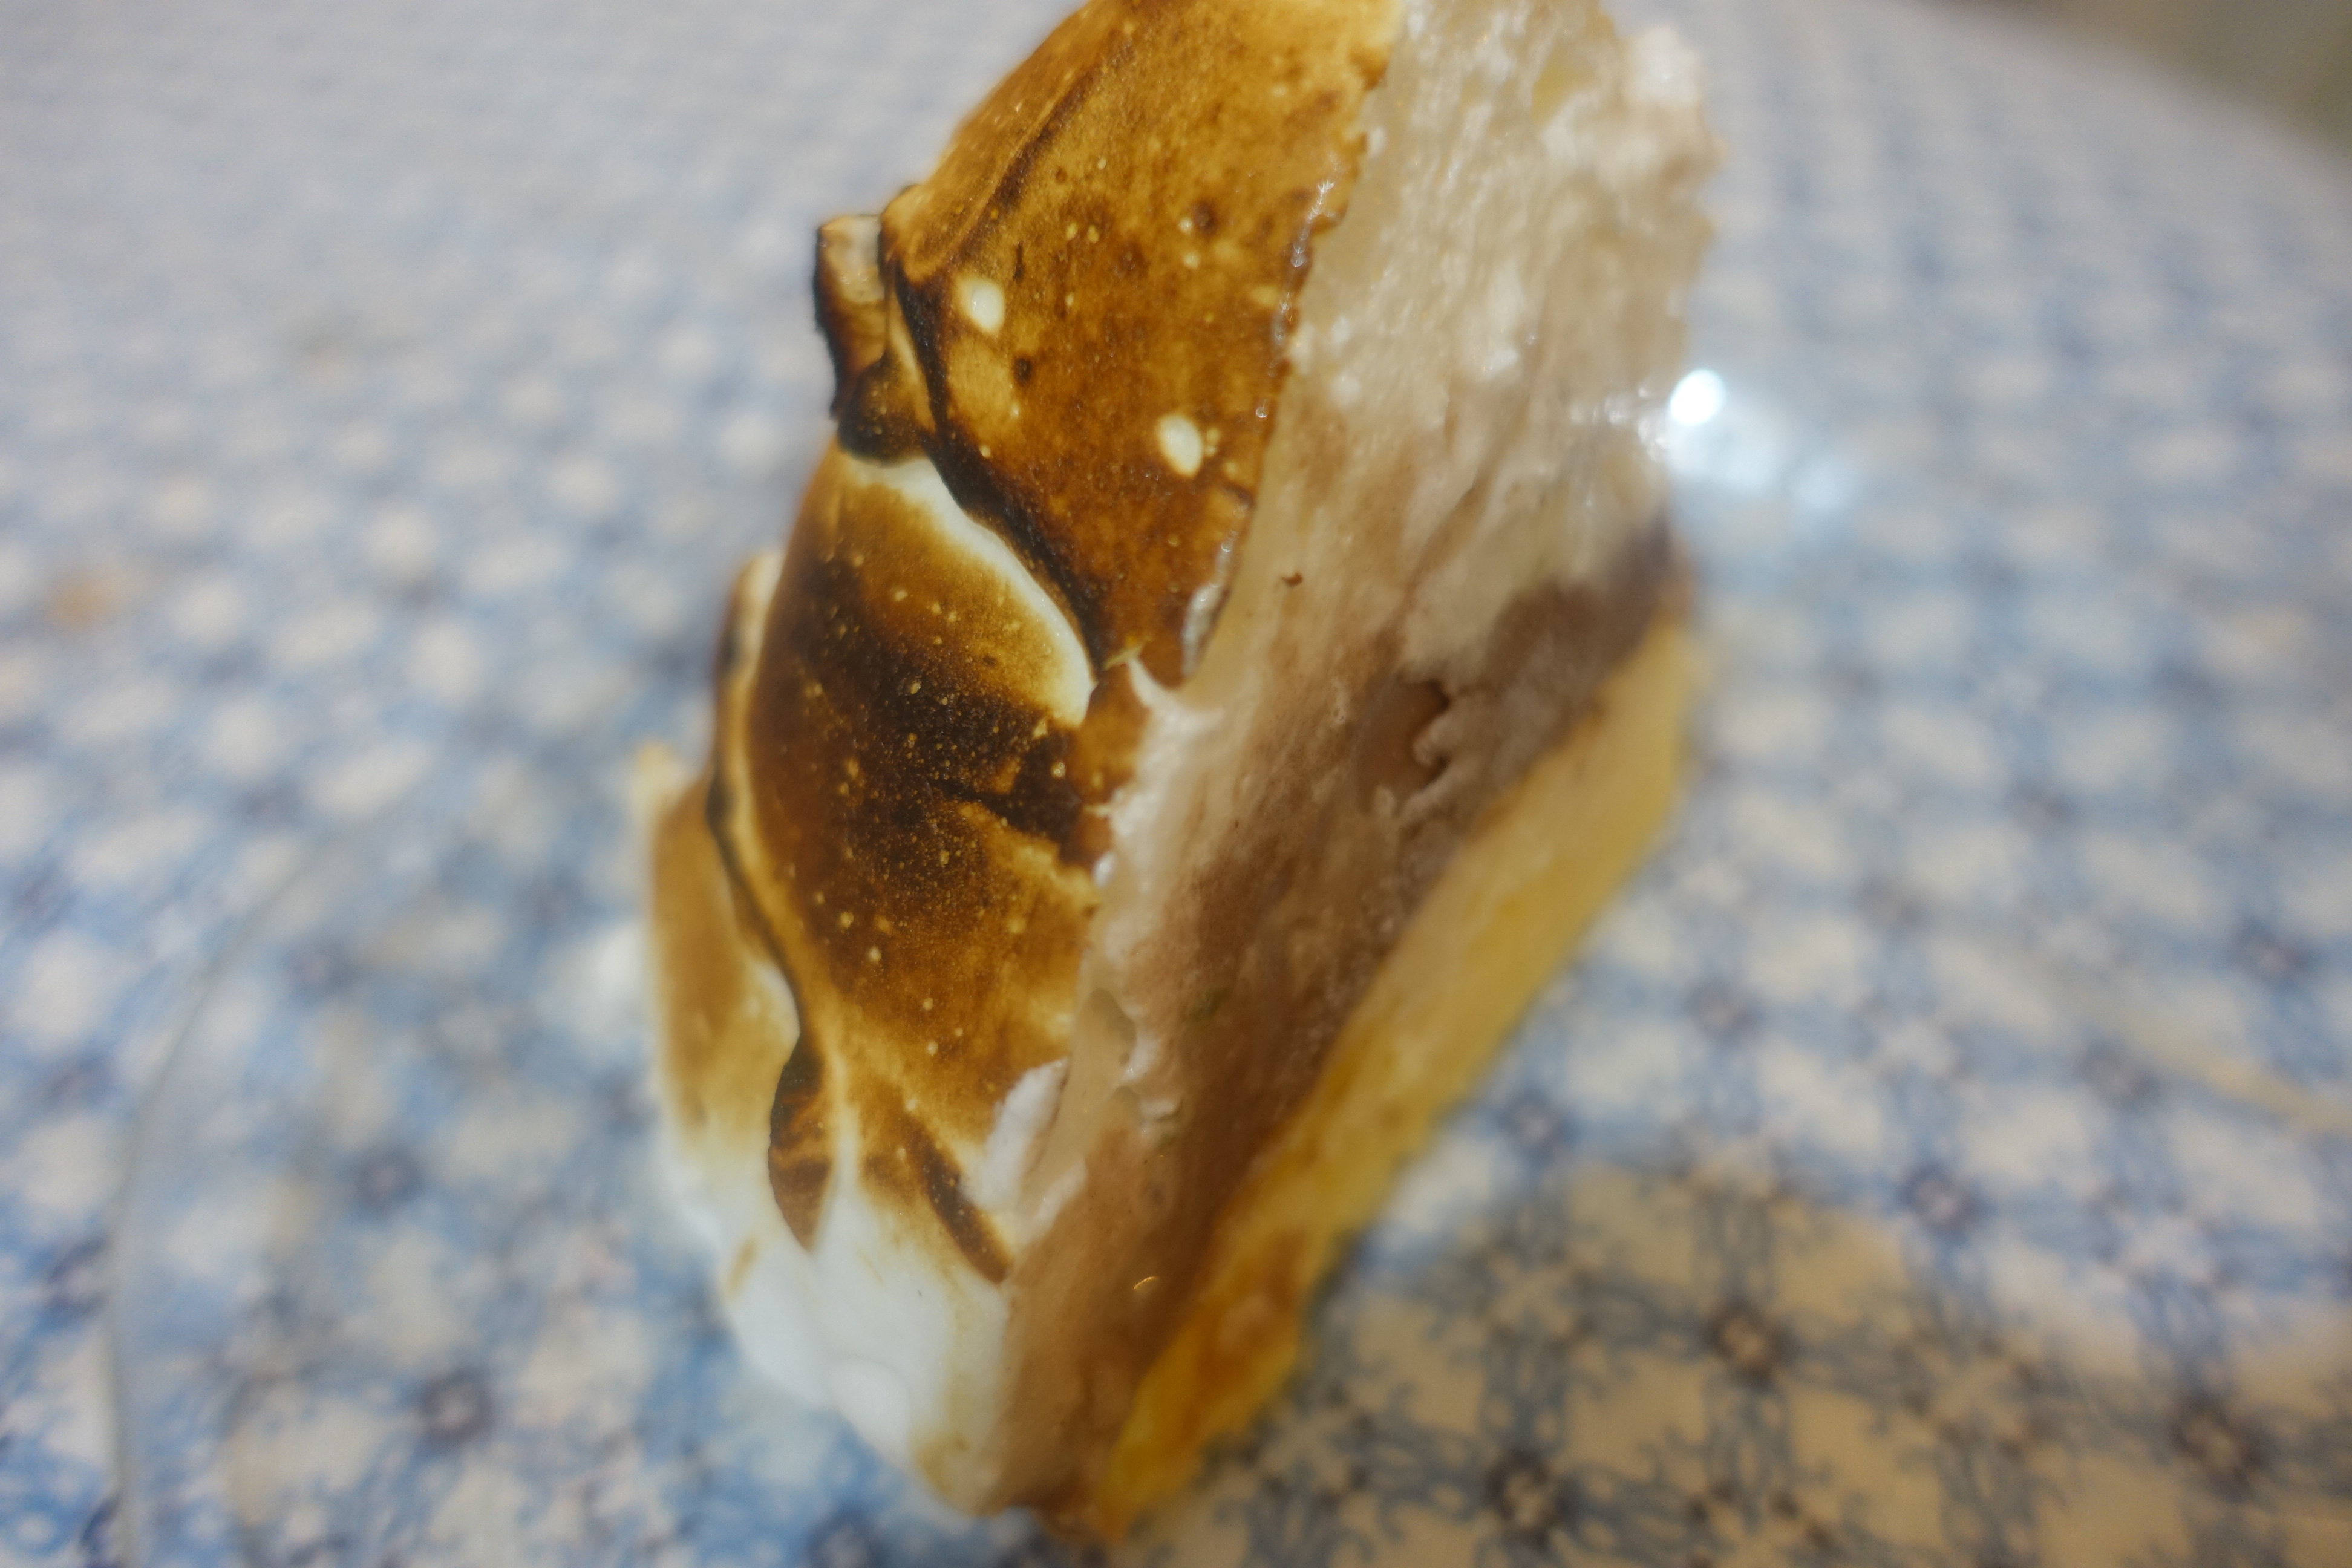
Layers of ice cream, sponge cake and topped with lightly browned meringue!
What is Baked Alaska?
Baked Alaska is like an ice cream cake, only better. With a layer of cake, two layers of ice cream and covered with a luscious and light meringue that is torched to golden perfection.
What can be more fun than having a culinary torch and using it to make delicious desserts?
How to Use a Culinary Torch
You know what? One of my favorite kitchen tools is a culinary torch. It’s the perfect tool for toasting the sugar on top of crème brûlée (it is responsible for creating that crispy caramelized sugar layer that makes it so special), lemon meringue pie and of course, Baked Alaska. This special culinary gadget is what makes the Baked Alaska get perfectly browned and honestly, it is my favorite part of making this dessert.

What I love about Baked Alaska is that it really looks so beautiful and it tastes so good. With a little prep ahead of time, it is also great to make ahead of time and then just add and torch the meringue when you’re ready to serve it.
Here’s the recipe:
Baked Alaska (Elegant Ice Cream Cake w/ Meringue)
For the Cake:
- 4 eggs
- 1/2 c flour
- 2 tsp baking powder
- 1/4 tsp salt
- 1 tsp almond extract
- 1/2 c sugar
For the ice cream:
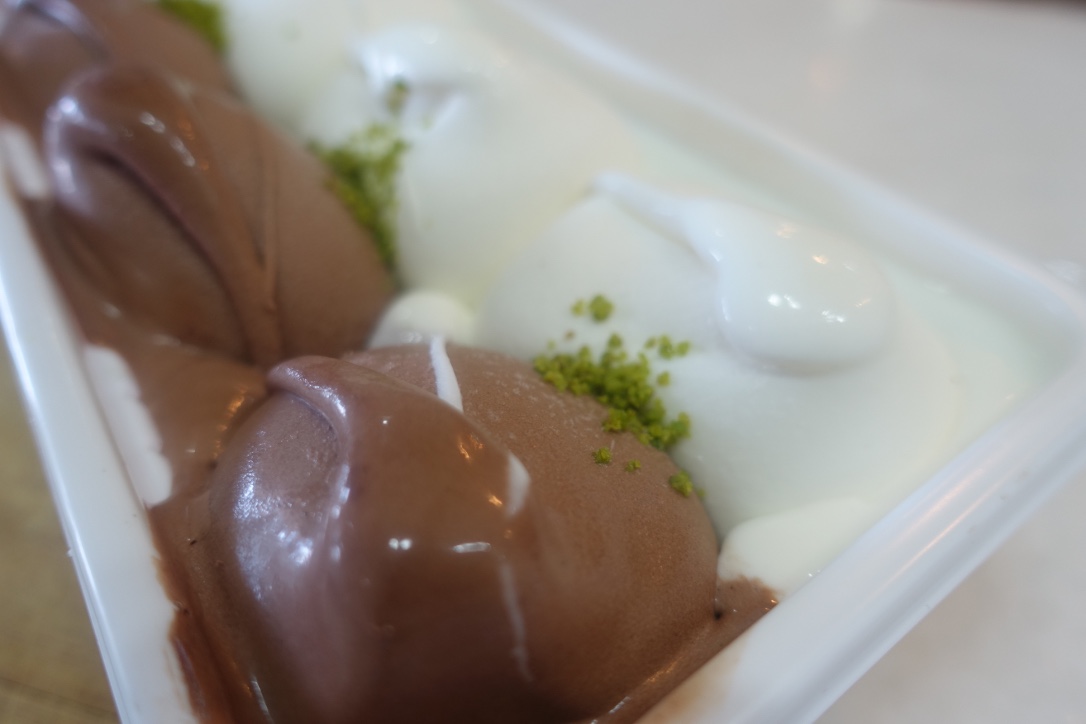
- 2 cups vanilla ice cream (softened)
- 2 cups chocolate ice cream (softened)
For the meringue:
- 2 egg whites
- 1 tsp white vinegar
- 1/4 c water
- 1/2 c white sugar
Preparation:
Pre-heat the oven for 180C/350F. Grease a springform pan and set aside.

For the cake: In a large bowl, whisk together the eggs and the sugar until well incorporated. Then add the almond extract and continue to whisk just until is mixed in. In a separate bowl, stir together the flour, salt and baking powder. Then add half of the flour mixture at a time into the egg and sugar mixture, stirring well in between each addition.
Pour the cake into a springform pan and pat it against the counter to release any air bubbles.
Bake for about 15-20 minutes. Note: I use a toothpick to test to make sure the cake is done. If the toothpick comes out clean, it is done. If not, it needs to bake a little longer.
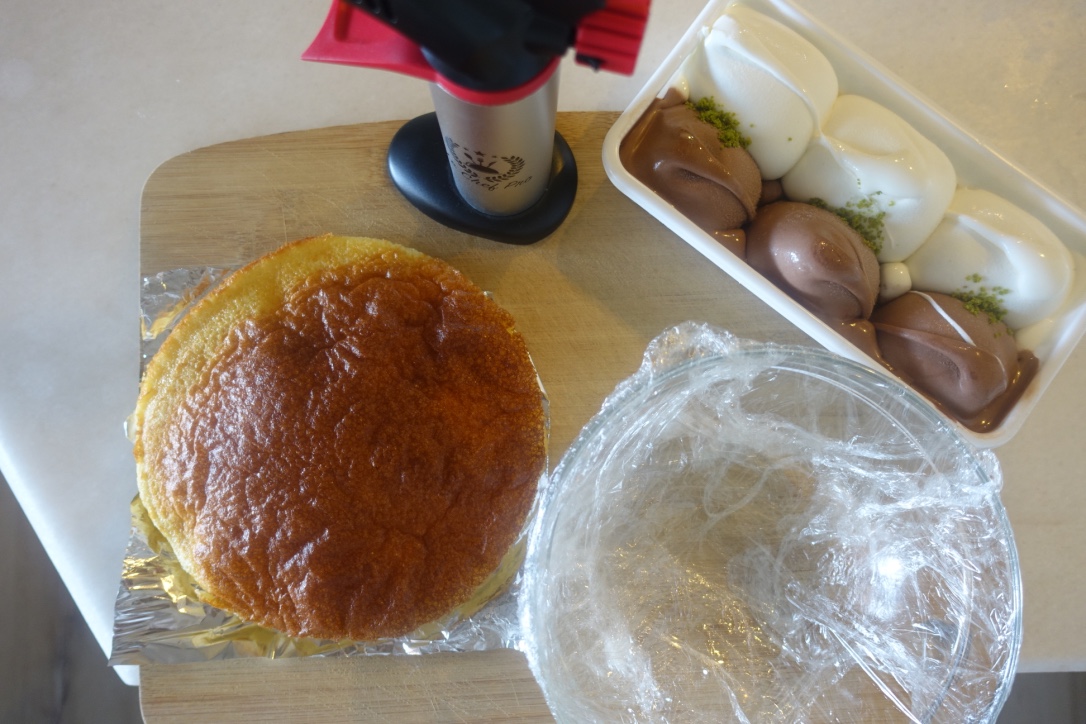
Allow cake to cool overnight (if possible) and then using the base of the bowl that the ice cream will be filled in, cut out a circle piece of the cake. Note: it is kind of like tracing, think of the bowl as the tracing paper for your cake.
To prepare the layers:
Remove the ice cream from the freezer about 30-40 minutes ahead of time (depending on the weather where you live it might melt faster or slower).
Then line the bowl with plastic wrap ensuring that the plastic wrap is firmly pressed against the bottom and sides of the bowl and that there is sufficient plastic wrap hanging over the sides. Note: don’t omit this step. It is a lifesaver when you actually go to remove the ice cream cake from the bowl.
Then spoon the softened ice cream into the bowl allowing each flavor to create its own layer.
Then take the circle piece of cake and firmly press it on top of the ice cream. Cover the cake with the plastic wrap overhanging on the sides of the bowl. Then place it in the freezer for a minimum of 2 hours or for several days (depending on when you want to serve the cake.
To make the meringue:
Place the sugar and water in a small sauce pan and bring to a light simmer, stirring constantly to ensure that the sugar does not stick. Once the sugar has dissolved, remove from the heat and set aside.
Place the egg whites and white vinegar in a very clean bowl and whisk until it forms soft peaks. Then while the beaters are still running, slowly pour in the sugar syrup mixture and continue whisking until stiff peaks form.
Take the cake out of the freezer and peel back the plastic wrap. Using a serving platter or plate, turn the bowl over and then gently lift the bowl. Then remove the remaining plastic wrap.
Using a butter knife (or a pastry bag if you prefer) spread the meringue on top of the cake until it is fully covered.
Then using a culinary torch, torch the meringue until it is evenly golden brown.
Serve and Enjoy immediately!
Bon Appetit!